1. Introduction: Why a Christmas Tree Cheesecake is the Perfect Holiday Dessert
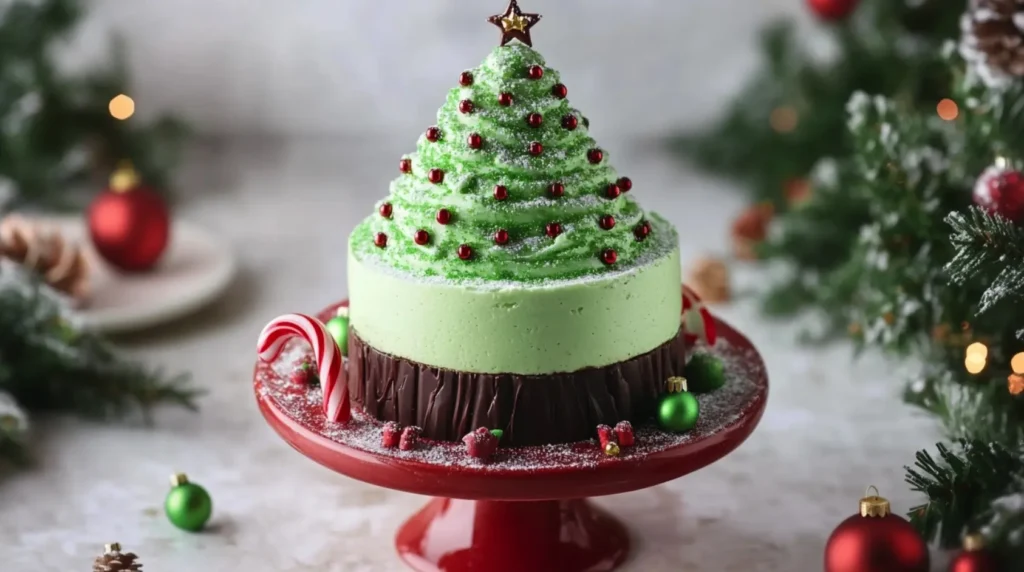
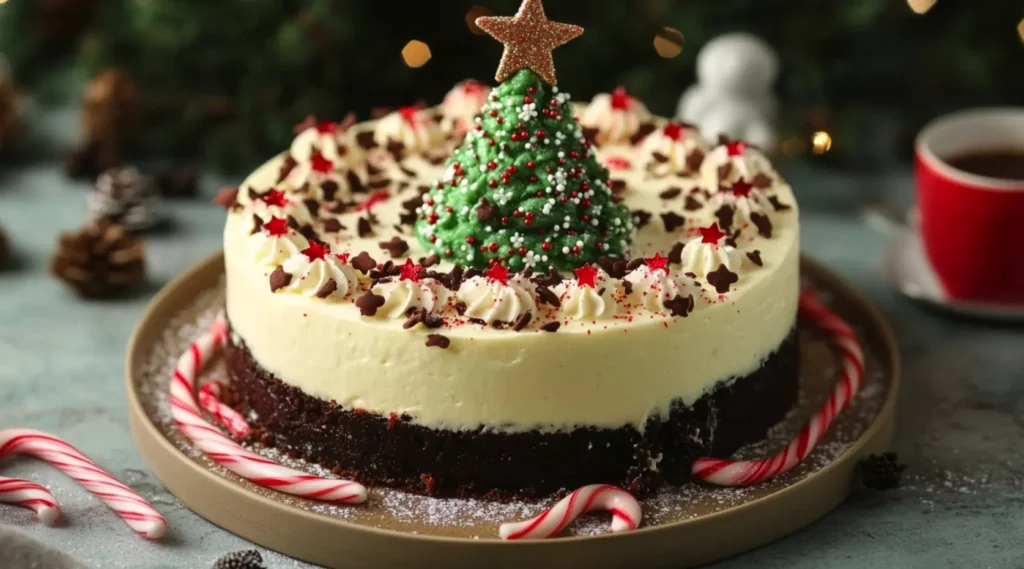
The holiday season is all about family, friends, and, of course, delicious desserts. If you’re looking for a show-stopping dessert that embodies the festive spirit, a Christmas Tree Cheesecake is your perfect choice. Not only is it visually stunning, but it also combines the creamy richness of cheesecake with the charm of a classic Christmas tree, making it ideal for holiday parties, family dinners, or even as a gift for loved ones.
Table of Contents

The Festive Charm of a Christmas Tree Cheesecake
There’s something magical about a dessert that not only tastes amazing but also captures the essence of the season. A Christmas Tree Cheesecake fits this description perfectly. The vibrant green color, combined with its unique tree shape, instantly evokes images of the holidays, bringing a sense of joy and celebration to any table. It’s a dessert that feels like a centerpiece, ready to be admired before it’s devoured.
A Showstopper for Holiday Gatherings
Imagine bringing out this stunning cheesecake at your next holiday party or family gathering. The Christmas Tree Cheesecake will undoubtedly steal the spotlight, becoming a conversation starter and a focal point of admiration. Its intricate design, colorful decorations, and indulgent taste make it a memorable addition to any festive spread. Whether you’re hosting a Christmas dinner, a New Year’s Eve party, or an office holiday party, this cheesecake is sure to be a crowd-pleaser.
The Popularity of Themed Desserts During the Holidays
Holiday-themed desserts have become a beloved tradition, and for good reason. People love the creativity and whimsy that come with festive treats, and there’s no better time of year to get imaginative in the kitchen. From gingerbread houses to snowman cookies, themed desserts not only reflect the holiday spirit but also bring families and friends together in the kitchen. The Christmas Tree Cheesecake joins this list of cherished holiday desserts, offering a delightful twist on a classic favorite.
2. Ingredients You’ll Need for Your Christmas Tree Cheesecake
Before you get started on crafting your own Christmas Tree Cheesecake, it’s important to gather all the necessary ingredients. This cheesecake recipe blends simplicity with elegance, ensuring that every bite is as delicious as it looks. Here’s a breakdown of what you’ll need:
The Cheesecake Filling
A traditional cheesecake filling is creamy, rich, and indulgent, forming the base of your Christmas Tree Cheesecake. The ingredients for this filling are fairly simple but come together to create the perfect texture and flavor.
- Cream cheese – This is the star of the filling. It provides that smooth, velvety texture that cheesecake lovers crave. Use full-fat cream cheese for the best consistency and flavor.
- Sugar – Sweeten the filling with granulated sugar. The right balance of sweetness will ensure that your cheesecake is indulgent without being overwhelming.
- Eggs – Eggs help set the cheesecake as it bakes, giving it a firm yet creamy texture. You’ll need whole eggs to achieve that smooth consistency.
- Vanilla extract – A dash of vanilla adds a warm, aromatic note that complements the richness of the cream cheese. It’s a simple addition that makes a big difference.
The Crust
The crust of your Christmas Tree Cheesecake is just as important as the filling. It provides a nice, crunchy contrast to the smooth and creamy filling while adding a layer of flavor.
- Digestive biscuits or graham crackers – These are the perfect base for your cheesecake crust. Their subtle sweetness and crumbly texture provide the right foundation. If you want a slightly more festive flavor, you could even opt for speculoos cookies for an added holiday touch.
- Butter – Melted butter holds the crust together and adds richness. It helps bind the crumbs together to form a sturdy foundation for your cheesecake.
Green Food Coloring
The most essential ingredient for creating your Christmas tree effect is green food coloring. You’ll need a good amount of food coloring to transform your cheesecake into a vibrant green, bringing that festive holiday charm to life. While you can use traditional liquid food coloring, I recommend gel food coloring for a deeper, more saturated color. It also ensures that your cheesecake doesn’t become too watery.
- Green food coloring – This will give your cheesecake that Christmas tree color. You can adjust the amount based on how deep you want the color to be. Start with a few drops and add more until you achieve the desired shade.
Decoration Essentials
What sets the Christmas Tree Cheesecake apart from an ordinary cheesecake is the decorations. You’ll want to make it as festive and fun as possible, so here are some essential ingredients to add that final touch.
- Edible glitter – This will make your tree sparkle like it’s dusted with snow. It’s an easy way to add a bit of glam without overpowering the overall look.
- Chocolate – Use melted chocolate to create the trunk of your Christmas tree. It not only gives a realistic effect but also adds a delightful contrast in flavor to the creamy cheesecake.
- Candy canes – Mini candy canes can serve as adorable tree ornaments or be crushed and sprinkled on top for a festive, minty crunch. These add an extra touch of Christmas flavor and charm.
3. Step-by-Step Instructions to Make the Cheesecake Base
Now that you have all your ingredients ready, it’s time to dive into the actual process of making your Christmas Tree Cheesecake. Here’s how you can prepare both the crust and filling for this festive dessert.
Prepare the Crust by Crushing Biscuits and Mixing with Butter

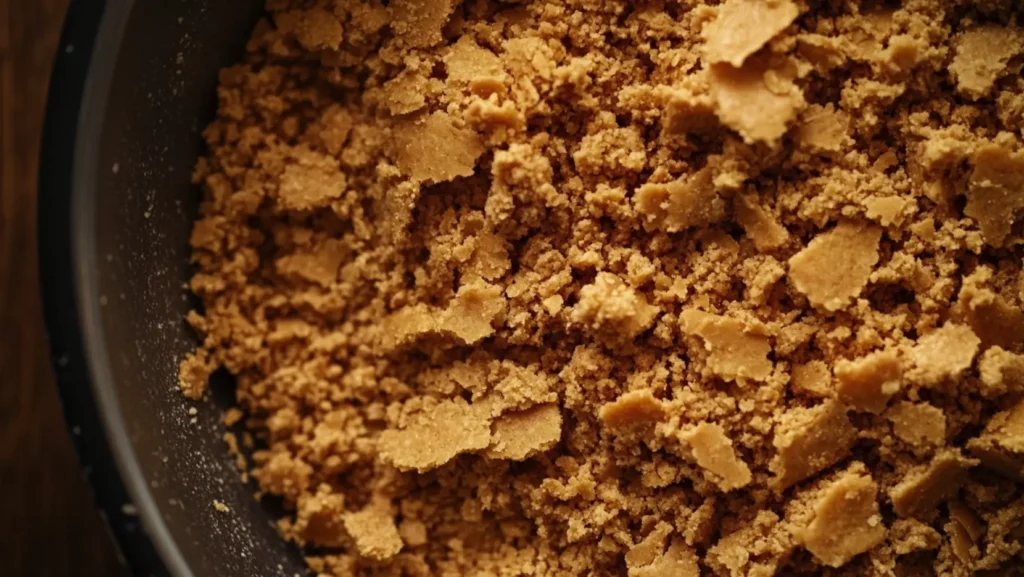
The crust provides the essential base for your cheesecake. To get started, you’ll need to crush the digestive biscuits or graham crackers. You can either place them in a food processor or put them in a ziplock bag and crush them with a rolling pin. Aim for fine crumbs, as this will help create a smooth, even crust.
- Pro Tip: For a more flavorful crust, consider adding a tablespoon of ground cinnamon or nutmeg to the crumbs. This will give the crust a subtle, warming spice that complements the sweetness of the cheesecake.
Once the biscuits are crushed, combine them with melted butter. Stir until the crumbs are evenly coated with butter, creating a mixture that resembles wet sand. This will bind the crust together when pressed into the pan.
Press the Crust into Your Chosen Pan and Bake
Transfer the biscuit-butter mixture into the bottom of your chosen baking pan. A 9-inch springform pan works best, but you can also use a round cake pan. Press the mixture firmly into the bottom using the back of a spoon or your fingers. Make sure it’s evenly spread, covering the base entirely.
Bake the crust in a preheated oven at 350°F (175°C) for about 8-10 minutes. This step ensures that the crust sets and becomes slightly golden, adding a crunchy texture to balance the creamy filling. Once baked, remove it from the oven and allow it to cool completely before adding the cheesecake filling.
Prepare the Cheesecake Filling by Mixing Cream Cheese, Sugar, Eggs, and Vanilla
While the crust is cooling, it’s time to prepare the filling. In a large mixing bowl, beat the cream cheese with an electric mixer until smooth. Add the sugar and continue mixing until the mixture is creamy and free of lumps. The next step is to add the eggs, one at a time, beating well after each addition. Finally, stir in the vanilla extract for that aromatic flavor that complements the rich cheesecake filling.
- Pro Tip: For a smoother filling, make sure the cream cheese is at room temperature before mixing. This ensures there are no lumps in the mixture and the texture is perfectly creamy.
Pour the Filling Over the Crust and Bake Until Set
Once your cheesecake filling is ready, pour it over the cooled crust. Spread the filling evenly with a spatula, ensuring that the surface is as smooth as possible. This will help achieve a neat and uniform look when you slice it later.
Bake the cheesecake at 325°F (160°C) for 50-60 minutes, or until the filling is set but still slightly wobbly in the center. If the cheesecake starts to brown too much on top, you can cover it loosely with foil. After baking, let the cheesecake cool in the oven with the door slightly ajar for about 1 hour to avoid cracking. Once cooled, refrigerate for at least 4 hours or overnight to let it firm up completely.
4. How to Shape Your Cheesecake Into a Christmas Tree
Shaping your cheesecake into a Christmas tree is the fun part! Once your cheesecake is completely set and chilled, you can start transforming it into a beautiful, festive centerpiece.
Allow the Cheesecake to Cool Before Shaping It
It’s essential to allow the cheesecake to cool completely before attempting to shape it. The cheesecake needs to be firm enough to hold its shape when cut. It’s best to refrigerate it overnight, which will not only help it firm up but also improve the flavors. Once chilled, it will be easier to cut and shape.
Cut the Cheesecake Into a Tree Shape Using a Template or Freehand
To shape the cheesecake into a Christmas tree, you can either use a template or cut it freehand, depending on your preference.
- Template Method: If you’re looking for precision, create a paper template of a Christmas tree and place it on top of the cheesecake. Use a sharp knife to carefully cut around the template, ensuring the shape is even and clean. If you don’t have a template, you can draw the tree shape with a pencil on a piece of parchment paper, cut it out, and use it as a stencil.
- Freehand Method: If you have a steady hand and enjoy the creative process, you can cut the cheesecake into a tree shape freehand. Start by cutting a triangular shape for the top of the tree and then work your way down to form the layers of the tree. Try to keep the layers even, but don’t worry too much about perfection—this is the beauty of a handmade dessert.
Use Green Food Coloring to Tint the Cheesecake, Creating the Tree Look
Once you’ve cut the cheesecake into the tree shape, it’s time to add color. In a small bowl, mix a few drops of green food coloring with a tiny amount of water. Using a pastry brush, gently paint the surface of the cheesecake to create the vibrant green color of the tree. Be careful not to use too much coloring, as this can make the cheesecake too wet.
- Pro Tip: Gel food coloring is more concentrated than liquid, so a little goes a long way. It also won’t change the texture of the cheesecake, ensuring the perfect consistency.
Tips on Achieving Smooth Edges and Neat Shapes for a Polished Look
Achieving smooth, clean edges is essential for a polished look. If you’re not happy with any rough edges, you can use a sharp knife to carefully trim them. For an extra smooth finish, gently warm the knife under hot water, dry it off, and then use it to smooth the edges of the cheesecake. This technique will give the tree a professional, neat appearance.
5. Decorating Your Christmas Tree Cheesecake

Now comes the fun part—decorating your cheesecake to resemble a festive Christmas tree. You can let your creativity shine here and add various elements to make the cheesecake truly magical.
How to Add a Tree Trunk Using Chocolate or Caramel
The tree trunk adds a lovely finishing touch to your cheesecake. To make it, melt some chocolate or caramel in a microwave-safe bowl, then pour it into the bottom of the cheesecake, creating a small base for your tree. You can also drizzle the melted chocolate or caramel over the edges of the cheesecake to give it a more rustic, snow-covered look.
- Pro Tip: If you want the tree trunk to be more defined, pipe the melted chocolate or caramel into a thicker layer around the base.
Decorating with Edible Glitter or Sprinkles for a Festive Touch
Add sparkle and magic to your tree with edible glitter. Sprinkle it generously over the cheesecake to mimic the shimmer of freshly fallen snow. You can also use colored sprinkles or sugar crystals for added texture and visual appeal.
Adding Candy Canes, Edible Ornaments, or Star-Shaped Toppers
To make your Christmas tree more realistic, decorate it with mini candy canes, edible ornaments, or even a star-shaped topper. You can use sugar stars or fondant to create a beautiful star to place on top of the tree. For a festive effect, you can even crush up some candy canes and sprinkle them on the tree, mimicking tree decorations or garland.
Presentation Tips: Place on a Decorative Platter for a Perfect Holiday Display
Once your Christmas Tree Cheesecake is decorated, the final step is to present it beautifully. Use a decorative platter or cake stand to elevate the cheesecake and give it a luxurious, festive feel. Surround the base with sprigs of holly or small Christmas ornaments for an extra touch of holiday cheer.
6. Final Tips and Variations to Elevate Your Christmas Tree Cheesecake
Now that your Christmas Tree Cheesecake is ready, here are a few final tips and variations to make it even more special.
Suggest Flavor Variations Like Adding Peppermint or Chocolate Chips
If you want to add a twist to your cheesecake, consider mixing in peppermint extract or chocolate chips into the cheesecake filling. Peppermint pairs beautifully with the creamy cheesecake and brings a holiday-favorite flavor. Chocolate chips, on the other hand, add extra richness and texture.
How to Make It Gluten-Free or Dairy-Free
If you have guests with dietary restrictions, it’s easy to make this cheesecake gluten-free or dairy-free. For a gluten-free crust, use gluten-free graham crackers or even crushed almonds as the base. For a dairy-free option, swap out the cream cheese with a dairy-free cream cheese alternative, and use a plant-based butter substitute.
Storage Tips for Keeping Your Cheesecake Fresh
Store any leftover cheesecake in an airtight container in the refrigerator. It should stay fresh for up to 4-5 days. If you want to make it ahead of time, you can prepare the cheesecake and store it (without decorations) in the fridge for up to two days before serving.
Ideas for Serving Alongside Hot Cocoa or Holiday Cocktails
To make your dessert even more indulgent, serve it with a warm mug of hot cocoa or a festive holiday cocktail. Pairing your cheesecake with a rich drink will elevate the overall experience and make it even more special for your guests.
Conclusion: The Ultimate Holiday Dessert
Crafting the perfect Christmas Tree Cheesecake is a fun, creative process that results in a stunning and delicious dessert perfect for holiday gatherings. Whether you follow the step-by-step instructions or put your own twist on it, this dessert will surely be a hit. From the crispy crust to the creamy filling, the festive decorations, and the variety of flavors you can incorporate, this cheesecake is more than just a dessert—it’s an experience that will bring joy and warmth to your holiday season. So grab your apron, gather your ingredients, and get ready to make the most festive cheesecake of the year!

